Main Takeaways:
- Understanding the exposure triangle (aperture, shutter speed, ISO) is key to getting the most out of your DSLR camera.
- Adjusting aperture controls depth of field, perfect for creative videography or photography.
- Shutter speed affects motion blur, ideal for capturing fast action or smooth video.
- ISO tweaks light sensitivity but needs careful balancing to avoid noise.
- Practice and experimentation are crucial for mastering your DSLR settings for stunning visuals.
Hey there, creative folks! Whether you’re a budding videographer, a graphic designer dabbling in photography, or a small business owner looking to up your content game, your DSLR camera is your best friend for creating jaw-dropping visuals. But let’s be real—those dials and settings can feel like a maze. The secret to unlocking your DSLR’s full potential? Mastering the exposure triangle: aperture, shutter speed, and ISO. This trio is the backbone of every great shot, and today, I’m sharing a valuable tip to help you nail it. Let’s dive in and make your videography or photography pop, whether you’re shooting for a graphic design project, web design content, or even 3D visualization marketing materials.
What’s the Exposure Triangle?
Think of the exposure triangle as the holy grail of DSLR photography. It’s the balance of three settings—aperture, shutter speed, and ISO—that determines how bright or dark your image is and how it captures light and motion. Get these right, and your photos or videos will look professional, crisp, and ready for any creative services project, from promotional videos to stunning archviz renders.
1. Aperture: Your Depth-of-Field Wizard
Aperture is all about the size of the lens opening, measured in f-stops (like f/2.8 or f/16). A lower f-stop (e.g., f/2.8) means a wider opening, letting in more light and creating that dreamy, blurry background (shallow depth of field). This is perfect for portrait shots or cinematic videography where you want your subject to stand out, like in a StoryBrand-style video highlighting your client’s story.
On the flip side, a higher f-stop (e.g., f/16) narrows the opening, keeping more of the scene in focus—great for landscapes or 3D visualization shots where you want every detail crystal clear. Tip: Start with an aperture of f/5.6 for a balanced look, then tweak based on your creative vision. For graphic design or web design projects, a shallow depth of field can make your visuals pop on a website or social media.
2. Shutter Speed: Freezing or Blurring Motion
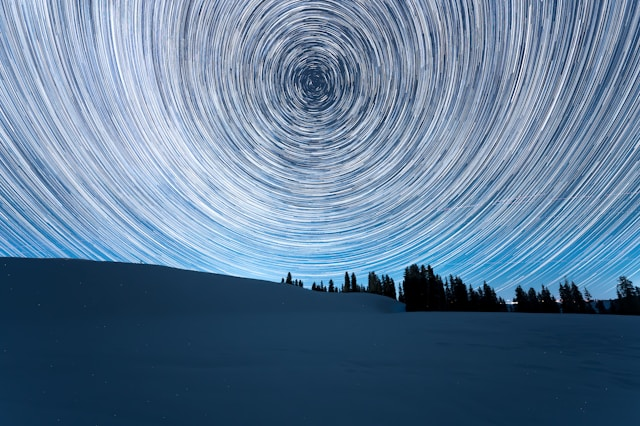
Shutter speed controls how long your camera’s sensor is exposed to light, measured in seconds or fractions (e.g., 1/1000s or 1s). Fast shutter speeds (like 1/1000s) freeze action, making them ideal for sports photography or fast-paced videography for a small business promo. Slow shutter speeds (like 1/30s or longer) create motion blur, perfect for silky waterfalls or light trails in creative shots.
Here’s the tip: For smooth video gear footage, set your shutter speed to double your frame rate (e.g., 1/50s for 24fps). This gives your videos that cinematic feel, perfect for marketing strategies that rely on storytelling. Experiment with shutter speed to add dynamic effects to your graphic design or web design content, like motion-blurred backgrounds for a modern website hero section.
3. ISO: The Light Sensitivity Slider
ISO adjusts how sensitive your camera is to light. A low ISO (like 100) is great for bright conditions, delivering clean, noise-free images. Higher ISOs (like 1600 or above) are for low-light scenarios but can introduce graininess, or “noise,” which might not vibe with polished archviz or 3D visualization renders.
Pro tip: Always aim for the lowest ISO possible for crisp shots, but don’t be afraid to bump it up in dim settings, like indoor shoots for a small business growth campaign. Just keep an eye on noise—check your shots on your camera’s LCD to ensure they’re clean enough for professional creative services.
Putting It All Together
Here’s the golden tip: Practice balancing the exposure triangle in manual mode. Auto mode is fine for beginners, but manual gives you full control, letting you craft images that align with your creative vision. Start with one setting—say, aperture for a specific depth of field—then adjust shutter speed and ISO to get the right exposure. For example, shooting a videography project for a StoryBrand marketing campaign? Use a wide aperture (f/2.8) for a cinematic look, a shutter speed of 1/50s for 24fps video, and an ISO that keeps things bright but clean.
Test different combos in various lighting conditions. Shoot in your backyard, a local park, or even a mock setup for a web design project. The more you experiment, the better you’ll understand how these settings work together to create stunning visuals for graphic design, videography, or 3D visualization projects.
Why This Matters for Your Creative Work
Mastering the exposure triangle isn’t just about taking better photos—it’s about elevating your creative services. Whether you’re crafting a promotional video for a small business, designing a website with killer visuals, or creating archviz renders that need perfect lighting, these skills make your work stand out. Plus, great visuals boost SEO strategy by keeping visitors on your site longer, improving engagement for web design projects.
So, grab your DSLR, switch to manual mode, and start playing with aperture, shutter speed, and ISO. Your next videography project or graphic design piece will thank you. Got a favorite DSLR tip? Drop it in the comments—I’d love to hear how you’re leveling up your creative game!